Pages

Sunday, July 10, 2016

A Day in Nagato

Nagato is one of my favorite places in Yamaguchi Prefecture! It is about 2.5 hours away from Iwakuni by car, which makes it a great day trip destination.

There are more than just a few reasons to visit Nagato, but the most famous of all now is probably the Motonosumi-inari Shrine. This shrine by the sea has 123 red Torii gates you can walk through as you enjoy beautiful views of the ocean.


The colors are stunning when it's a beautiful day, and in the summer months it's even more spectacular because everything is so green!


After you finish walking around and enjoying the wonderful views, be sure to try your hand at getting some money into the offer box at the top of the Torii gate located right across from the parking lot. I usually use whatever I have in my wallet, besides a one yen coin (too light).....and it usually takes me a few tries. Okay, it may have taken me 6 or more tries my very first time. I wouldn't have felt so down about it if the guy before me didn't get it in there on his first try! Really?! Having an audience didn't help matters much either (so much pressure!), but I did finally make it and my audience actually cheered for me!

They do have parking right across the entrance. The first couple of times I went there were hardly any other cars in the lot, but when I went a couple of weeks ago the parking was completely full. Luckily someone started to leave right as I was trying to figure out what to do. Also, the road leading to the shrine can get pretty narrow in some spots. There was a tour bus there a couple of weeks ago so it's not crazy narrow, but I am really glad I didn't run into that bus on my way there or on my way out.
This shrine is not stroller friendly as there are steps walking down through the Torii gates.

Another place to check out in Nagato is Senjojiki, which means one thousand tatami mats. I believe that is to describe how large of a space it is, and it's pretty large. I would say more than a thousand tatami mats large, but I do like the name. The views from here are pretty amazing! There is also plenty of space to throw down a blanket and have a nice picnic lunch or just relax for a little bit. I saw a few benches around the area too so there were definitely plenty of places to have a seat and take it all in.
Senjojiki is not too far from the Motonosumi-inari Shrine and it has a good amount of parking.


Be sure to explore the area and enjoy the views!

If you like boat tours, there is one in Nagato that goes around Omijima. There are different tours to choose from, but the one that goes all the way around Omijima can get canceled depending on how rough the waters are. The day I went, the waters were too rough for the full tour so I just did the short tour. It was still very beautiful and the rock formations were really neat too.

I don't recommend sitting at the very front of the boat. The views are not so great and when we hit a rough patch, I'm pretty sure the front of the boat got the worst of it. They do have an area in the back where you can go out to enjoy the views and take pictures.


There are some other really great places to explore in Nagato, and I hope this helps you plan your own day trip to explore the other side of Yamaguchi Prefecture!

Sunday, June 5, 2016

Susa Hornfels


I have been trying to get to the Susa Hornfels for a few years now. Every time I planned to go, it just didn't work out. So, of course, the one time I don't plan on going is when I finally make it there!

A couple of weeks ago, I was on my way home from a whirlwind day trip to Nagato, Omijima, and Hagi when I saw the sign for Susa. It was still kind of early and when I typed the Hornfels into Google Maps it showed that we would get there in about 20 minutes. So, I told my friends we were going to take a little side trip on the way home and started driving towards Susa. Well, I did a happy dance and jumped around for a few minutes before I got back in the van. I may have even squealed with joy while I was jumping around. At any rate, I was pretty excited!

About 20 minutes later I hear, "You have arrived at your destination." Um. Nope. I'm pretty sure the thing on my right is a train station and on my left are some buildings.... What the heck Google Maps?! I was a little bit sad because I thought I was going to have to see it some other time. I kept on driving straight so I could find a place to pull over and figure out the quickest way to get home, and then I saw a sign that said "Susa Hornfels" in English!! I followed the signs and I found it!


I couldn't wait to get down there and see it up close! I think the walk down was less than 10 minutes, but when I got to the end of the path I realized the real fun was about to begin. The rest of the walk down was definitely a little scary for me. It's rugged and slanted and I kept thinking I was going to slip (parts of it were wet). Then I saw a couple coming back up and the girl had HEELS on. Ahhhh....It's official. I'm a wuss. I will say that she was walking very slowly and very carefully, but still. I did not have heels on and I think she was walking faster than me.

I did manage to make it to the bottom without slipping! I would have done a happy dance, but it was very uneven and I wasn't going to push my luck.


It was so beautiful! The different layers of colors were just so amazing to me. I couldn't stop staring at it. It was like a large piece of artwork.


There was another path that went to the left when we started walking from the car to the path leading down to the Hornfels. I really wanted to go check it out, but I ran out of time. I guess that means I have to go back, right??

I highly recommend adding this beautiful place to your itinerary when you head to Hagi. It ended up being about 30 minutes from Hagi and then it took us a few hours to get home from the Hornfels. We didn't take the expressway at all on the way back.

Sunday, September 6, 2015

Pilgrimage Adventures - Part 1

Almost a year ago, I had the most amazing, whirlwind of a weekend with my friend, Tina! 17 temples and shrines, a wonderful hotel, friendly people, and about 700 kilometers added to my car. It was an experience I will cherish forever and I learned a few things I wanted to share with those who are interested in doing a pilgrimage in Japan.

I'm not exactly sure how I came across the site for the Izumo Shinbutsu Pilgrimage, but as soon as I saw it I knew I wanted to do it. I have been curious about temple pilgrimages since I read about the 88 Temple Pilgrimage in Shikoku a few years ago. 88 temples seemed a little overwhelming, but I found myself thinking about it from time to time. Wondering if there was a way to do it. I thought, maybe if I take my time and do it over a year I could complete it. Then, I stumbled upon the Izumo Shinbutsu Pilgrimage website. Very informative AND it's only 20 temples and shrines. I thought 20 would be a good one to start with. I was also really excited when I saw that this one was a combination of shrines and temples since the other ones I had seen were temples only.

Why did I want to do this pilgrimage? I love the temples and shrines in Japan, and I have become quite obsessed with collecting the temple stamps. I have 2 full books so far! I also thought this would be a good way to see temples, shrines, and areas of Japan I probably wouldn't have seen otherwise. Many of the temples and shrines in this pilgrimage are not mentioned in a lot of tourist sites, and if they are, they are listed way at the bottom so most people don't bother. We saw some amazing countryside and visited some really beautiful temples and shrines on this trip! I know I would not have seen most of this if I hadn't decided to do this pilgrimage. I am not a buddhist, but I do offer a donation and a prayer at any shrine or temple I visit. My mother was quite excited when I told her I was doing this, but then she looked at me with a very stern look on her face and said, "You better not just go there and take pictures and get your shuin and leave! You better show some respect and offer a donation and prayer!" I assured her that I have been doing this already and that seemed to make her happy. I will admit though that I used to be one of those people who just took pictures and got my shuin, and left. I didn't want to ruin my perfect daughter image so I kept that information to myself.
If you're not sure of what to do at the temples and shrines, here is some information that might help. You may have noticed an area with water and wooden cups with long handles around the entrance of a shrine or temple you have visited. This is for people to cleanse (or purify) themselves before entering the temple or shrine. I typically grab the handle with my right hand, fill it with water, and then pour it over my left hand. I then switch hands and do the same to my right. Now you can head to the shrine or temple. Once you go up to where the donation box is, gently place the money in the open slats on top and take a very small step back. If you are at a shrine, bow twice and then clap your hands twice. Keeping your hands together, say a quick prayer or just enjoy a moment of silence. Bow one more time. If you are at a temple, bring your hands together and bow. Say your prayer or enjoy a moment of silence.

I know I opened with how we visited 17 temples and shrines over the weekend and this is a 20 temple/shrine pilgrimage. We had already visited 2 shrines and 1 temple on previous trips to the area. So, that left us with 17 more to visit to complete our pilgrimage. Tina and I decided we would do the remaining 17 over a weekend. So, I sat down and wrote out a plan based on where the temples/shrines were located and I ended up with an itinerary that had us visiting 8 on the first day and 9 on the second day. I also managed to find a hotel that was a perfect stopping point and had an onsen bath. They had me at onsen bath. After driving all day and walking around 8 temples/shrines, I figured our bodies would really appreciate a nice long soak in a hot bath. I was so right.

We left at 0700 on a Saturday morning and after a quick stop at the 7-Eleven (COFFEE!! and money), we were on our way. It was about a 3 hour drive to our first shrine so we arrived a little after 1000.

Our first stop was at No.18, SUSA SHRINE.


This shrine is mostly known for the beautiful giant cedar tree in the back that is believed to be 1200 years old.


After we got our shuin (temple stamp), said our prayer, and explored the grounds of the shrine, we headed to the next place on our list.

Our second stop was at No.17, MINEJI TEMPLE.
The drive to this temple was quite interesting. Some of the temples and shrines we visited involved driving on some very small roads to get to them. When I say small, I mean there was barely enough room for one vehicle, but it was a two-way road. There were a couple of times over the weekend that I really thought there was no way we were anywhere near a shrine or a temple, but I would round a corner and there it would be. This was one of those.

This temple was surrounded by some beautiful scenery so we had quite an area to explore before getting our shuin and saying our prayers.
While we were walking around exploring, we ran into a couple of ladies who asked us what brought us to this particular temple. When I explained that we were trying to complete the pilgrimage, both of the ladies said they were doing it too. One had only completed a few and the other didn't have too many left to visit. They asked us how far along we were so I explained that we were planning to complete the pilgrimage that weekend. They were both pretty surprised that we were trying to visit 17 temples and shrines in 2 days. They were also surprised we had driven from Iwakuni just that morning and planned on driving back to Iwakuni the following evening. We spoke for a few more minutes before parting ways. They were very sweet and wished us both safe travels for the rest of our pilgrimage.
We headed down to the temple and purchased our shuin before heading over to offer our donation and prayer at the temple. Then it was time to get back on the road.

Our third stop was at No.16, SUGA SHRINE.
I was very excited about this one because when I was researching and planning this trip, I read on the Shinbutsu Pilgrimage website that this was known as the first shrine in Japan!

This shrine was not very big and the grounds area was not very large. There is a hiking path behind the shrine, but we were starving by the time we got here so we walked around, said out prayers, got our shuin, and went in search for a place to grab some food.

Here is the shuin we received from the Suga Shrine -

We were hoping we would find a place to eat on the way to our next shrine, and we did! There was a soba place on the side of the road that didn't look like much from the outside, but it did look like it had been there for a while. Soba sounded good to us!
They make their own soba noodles from scratch, and the owner is a wonderful older gentleman who had passed on the family business to one of his children, but still loves to come in and chat with the customers. He asked us where we had come from and what we were doing in this area. I explained that we were on a pilgrimage and he chatted with us for a few minutes while we waited for our food.

They brought out the dipping sauce for the soba, along with some pickles and little appetizer-like items.


Then, they brought out our soba noodles and toppings. I loved the stacking bowls that the noodles were served in!


The soba was delicious, and Tina was kind enough to pose with the empty bowls on our table.

When we were leaving, the owner stopped us and gave us some roasted sweet potatoes and some grapes. We were so thankful to have met such wonderful people!

Now we were ready to continue on our pilgrimage. We had five more temples and shrines to get to before we headed to our hotel for the evening. I couldn't wait to soak in the onsen bath!

To be continued....

Thursday, September 3, 2015

Kaisugi Ramen

This ramen place has been on my list for some time now, and I finally made it! What took so long, you ask? Well.... they don't open until 1900 and I'm usually starving by then. I need to eat by 1800 or 1830 at the latest, or I become slightly cranky. Okay. Maybe a little bit more than just slightly. My good friend, Tina, was leaving me though and she really wanted to eat here so we made plans to try it out before she flew out.

I wasn't sure where it was located, but I got the pin from their Facebook page and headed towards downtown Iwakuni. I knew where I would park and figured it would be a short walk from the parking lot. As soon as I started to make the turn into the parking lot though, Google maps stated that I had arrived at my destination. What??? Tina and I started laughing and looking around, and there it was! Right next to the pay parking lot I was pulling into.


Yay! We found it! -


Once we sat down, I picked up the menu and started looking it over. The menu is pretty simple, but I wanted to try everything on it. Tina already knew she wanted spicy ramen, and I decided on the chashu ramen. Chashu is the pork slices you usually find in ramen. While I was looking over the menu I also noticed that they have handmade gyoza. A lot of ramen places I have been to use frozen gyoza (the kind you can buy in a grocery store) so I get very excited when I see that a place makes their own!

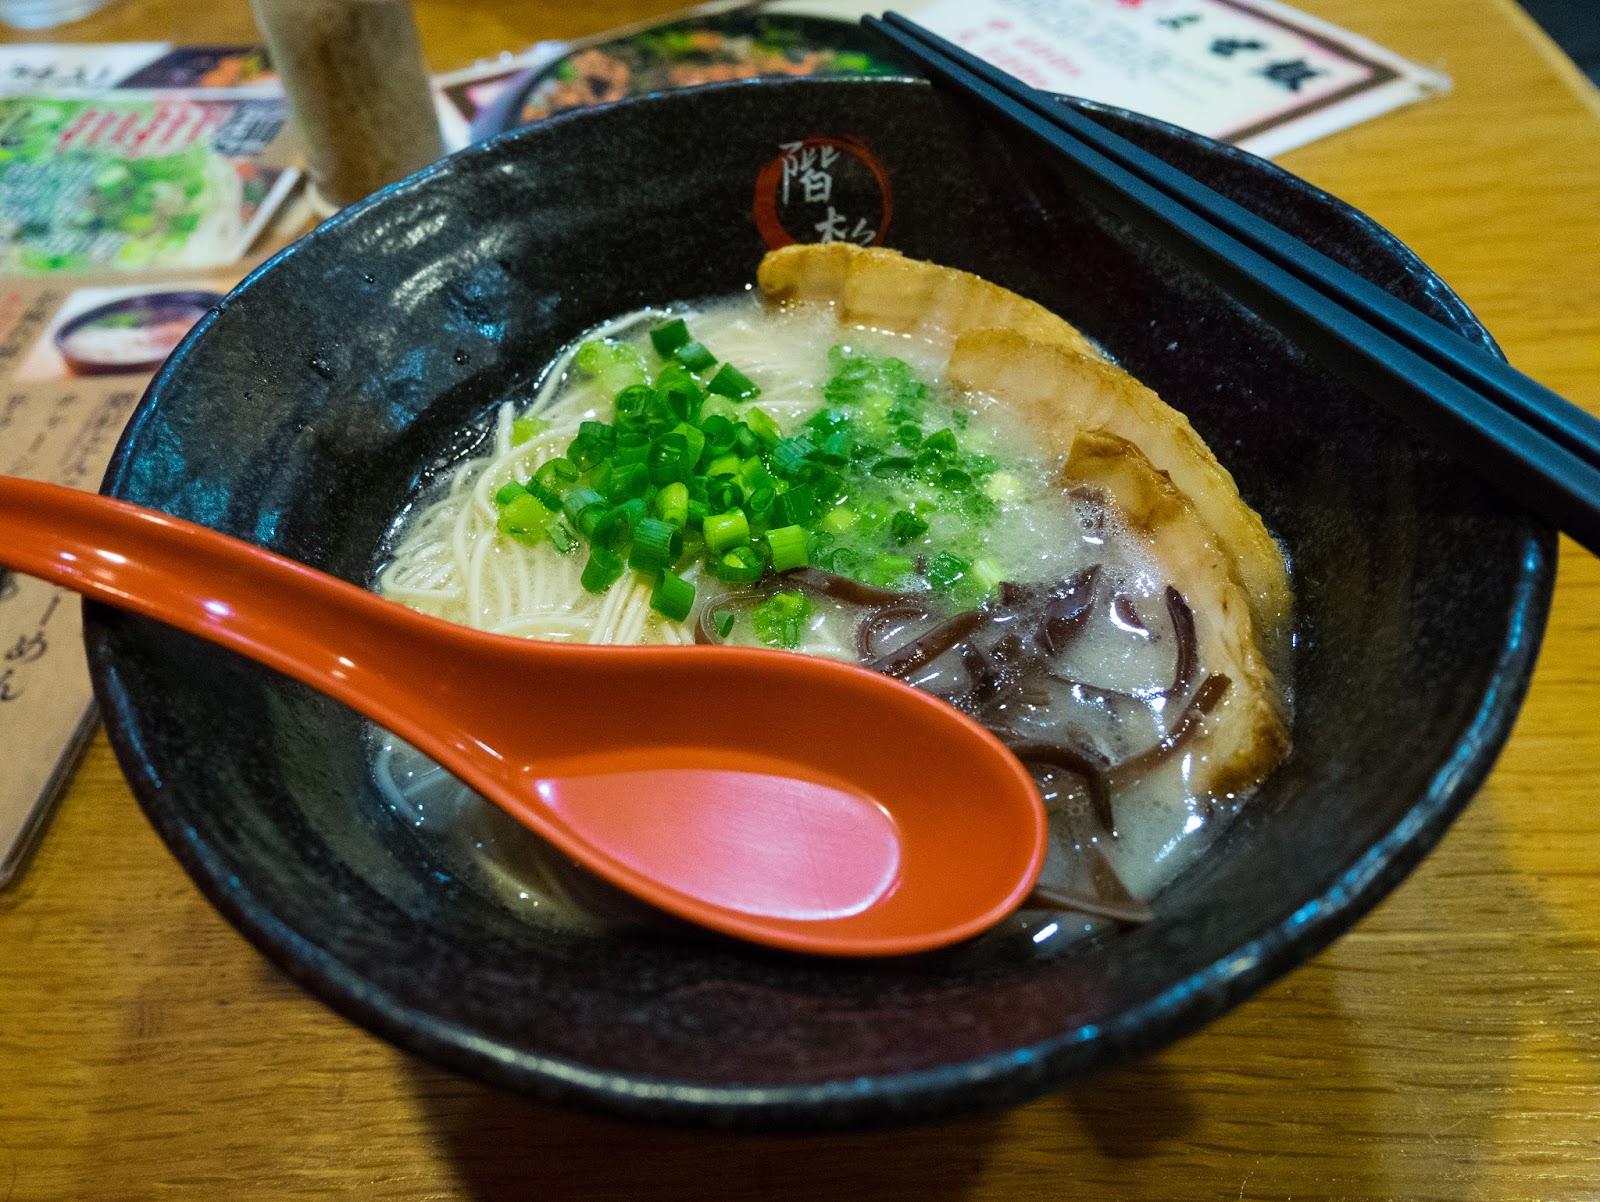
When my ramen came to the table, I couldn't wait to dig in! BUT, I did wait long enough to take this picture -


...aaaand when they brought Tina's, she was kind enough to wait so I could take a picture of hers too -
You can choose your level of spiciness for your ramen. Tina ordered a level 1.


The gyoza -


The ramen was delicious and the chashu was so tender and flavorful! Tina really enjoyed her spicy ramen too, and we both loved the gyoza. I think I have found a new favorite place to get my ramen fix! I just wish they opened before 1900!!!

The prices were very reasonable too. Our total bill was a little over 2,000yen which was less than $20 at the time.
They only accept yen.

Hours: 1900-0300
Telephone: 0827-22-1000
Address: 麻里布町6丁目2-1, Iwakuni 740-0018


Sunday, July 19, 2015

Taishaku-kyo Gorge

A couple of weeks ago, I went hiking in one of the most beautiful places I have ever seen and I had to share it with everyone because I had such a hard time finding a lot of information on it!

I don't remember how I first heard about Taishakukyo, but I went online to find out more about it and didn't have much luck. I found a couple of sites that had beautiful pictures and then maybe one paragraph about it that didn't really explain anything. I like adventures and exploring so I wasn't worried about trying to figure things out when I got there, but I do like to plan my day out so I can make sure I see and do everything on my list. Since the only thing that is really mentioned is the natural stone bridge though, my list was pretty short. Do some hiking and see this amazing stone bridge. Easy enough, right?

Two hours after getting on the road, my Google maps announced that my destination was on the right. Umm... that couldn't be since there wasn't really anything on my right and on my left was a small parking lot and what looked like a little udon restaurant. The good news was that I had seen a sign a few minutes before this so I knew I was on the right road at least. I drove on for a few more minutes and noticed a large parking lot on my right, but there wasn't really anything there. I'm thinking that the main entrance for this gorge would be pretty big and have some shops or a place where I could get some information so I keep driving. I get a little further up the road and I decided I should go back and check out the parking lot. There is a huge map there and what looks like the starting point for a hiking trail. I noticed on the map that there was a "Trail Center" not too far from this starting point so I decided this would be a good place to start. After hiking for about 15 minutes, I reached the Trail Center. Unfortunately, there wasn't anyone there and the only brochures they had were in Japanese. They did have maps though so I thought I could follow the map to find the main entrance that I was looking for.

Some pictures of what I saw when I hiked to the Trail Center -
The trail was pretty and there were a couple of awesome red bridges along the way!


I got back to my car and headed off in the direction I thought would take me to the main entrance. Did I mention I'm not good at reading maps? Yeah. My lack of map reading skills became an issue when, 30 minutes later, I still hadn't reached the main entrance. There's no way it should have taken that long. So, I pulled over and looked at the map again, but that just confused me even more. Then I tried to see if maybe the camp grounds near the main entrance would come up in Google maps, and they did! If only I had thought of that sooner! It took me back in the direction I came from and once I found the campgrounds, I was able to figure out where the main entrance was! Slightly frustrated about the wasted time, but so excited I had finally found what I was looking for!


There was a pretty large parking lot and a store with a small restaurant inside. This is what I expected to find at the main entrance. Since I lost some time trying to figure out how to get here, I didn't have a lot of time to waste so I parked and headed off to find the trail. Within a few minutes, I knew that this side of the gorge was going to be even more beautiful than the other side with the bridges (and I LOVE bridges!!)! I couldn't wait to explore and find the amazing natural stone bridge!

This was taken at the start of the hiking trail. Everything was really green and the water was so clear!

As I walked along the path, I saw some steps on the left that led up to something. It was a cave! Of course I checked it out, and it was so cool! There was a 250yen fee to go inside, but well worth it.

I continued on the hiking path and the scenery was so gorgeous that I couldn't stop taking pictures. Not sure how much of a workout I got with all of the stops, but I did get some beautiful shots!

See what I mean?? I could have stayed here all day!


After walking and stopping to take pictures for a few more minutes, I finally made it to the natural bridge. Wow! It was even more amazing in person!

My picture does not do it justice.

Since it was going to take me 2 hours to get home, I only walked for about 10 more minutes past the natural bridge and then I headed back. According to the map though, there is a waterfall further up the trail that I would love to see. I have also heard that this gorge is beyond stunning during in the fall so I guess this means I need to go back in the fall. Now that I know how to get to the main entrance though, I will definitely have enough time!

On my way back to the expressway entrance I realized that I had made a wrong turn when I got off of the expressway. If I hadn't turned when I did, I probably would have found the entrance to the gorge within 5 minutes of arriving. Google maps is usually great and gets me where I need to go, but this time it really failed me. There may have been a sign, but I was probably too busy chatting with my friend and didn't see it. Lesson learned for the next time I go somewhere I haven't visited before.

Here is the information I was able to gather. I didn't have time to explore the entire area like I wanted to so I am sure I missed a lot, but hopefully this will help you plan your own adventure to Taishakukyo gorge!

It does take about 2 hours to get there by car, and the tolls were a little over 4,000yen each way if you get on and off in Otake.
Address for the main entrance -
1940 Tōjōchō Taishakumido, Shōbara-shi, Hiroshima-ken 729-5244

Link to the pin on Google maps -
http://goo.gl/maps/dJqn5

There are campgrounds available at a few different areas around the gorge. They also have log cabins and cottages for rent. I saw the log cottages when I stopped to grab some lunch and they looked really nice from the outside. For more information and to make reservations to stay in the log cottages, please call (0847)86-0535. I would recommend asking someone who can speak Japanese to call for you as I'm not sure if they have any English speaking staff available. There are Segways for rent too, but you have to make reservations at least 2 days in advance. Please call the same number to make Segway reservations. Across the street from log cottages is a nice little restaurant and shop. The restaurant serves up beef dishes made with beef from a local farm. There was a little playground there and tables outside with grills in the middle. You can order a BBQ plate from the restaurant with beef and vegetables, and sit outside to grill as you eat. To get to the area with the restaurant, cottages, and Segway rental, just type in the phone number and it will come up in Google maps.

There was also a fishing area at the main entrance.

Fresh air, beautiful scenery, and plenty of activities for the entire family to enjoy! Tasihakukyo gorge is a perfect spot for a day trip or a weekend getaway.

Wednesday, April 30, 2014

Japanese Curry... made by you!

I've had quite a few people ask me how to make Japanese curry so I thought I would take some pictures and blog about it.

It's actually quite easy and doesn't take a lot of time at all.

This will make a pretty big pot so if you just want to make a little bit, just use half the box of curry seasoning and use only half of the amount for each ingredient.

For my version you will need the following:

3-4 medium onions
3 carrots
7-8 small potatoes
2 chicken breasts
2 chicken thighs
1 box of Japanese curry seasoning
4 1/2 cups of water
2 TBSP olive oil
Rice (cooked) to serve over

Cut onions into chunks. I usually cut it in half and then cut each half into thirds. Slice carrots. I slice them until I get to the thicker part and then I usually cut that in half and then continue to slice.

I cut my potatoes in half, and then cut each half in half again.
Remove skin and as much fat as you can from the chicken. Cut into bite sized chunks. Sometimes, mine are a little bit bigger than bite sized. I'm not all that great with a knife.

Pour the olive oil into a large pot and place on medium-high heat. Once the pan is hot, add the onions and carrots and chicken to the pan.
Sprinkle a little bit of salt and pepper on everything (optional). Stir everything with a wooden spoon and sauté for about 10 minutes. Add 4 1/2 cups of water and the potatoes, and let it come to a boil.
Once it starts to boil, turn it down a little bit. It should still be boiling, but a light boil.
Let it boil for about 20 minutes, stirring occasionally. Skim off any foam or fat that floats to the top as necessary.

Now you're ready to add the curry blocks. Remove the pot from the heat and add blocks of curry. Stir until it has all dissolved. It's very important that you remove the pot from the heat before adding the curry blocks. It helps with the thickening process.

Once the curry has dissolved, place the pot back onto the stove and bring to a light boil. Continue to cook for 10 minutes.

Put some rice into a bowl and ladle some curry over it, and dinner is served!!
ITADAKIMASU!

***Experiment with different brands of curry seasoning and add different things to your curry. This is my favorite way of making it, but every now and then I will make it with beef. You can also add mushrooms if you like. I also switch up the brand of curry that I use. I haven't had one that I didn't like yet. I also mix half a box of mild curry with half a box of medium curry. My son likes a little kick and I'm a wuss so this is my compromise. You can also adjust the amount of vegetables and meat you add in. I prefer mine to have lots of veggies and chicken so I typically add more than normal. If you do purchase a different brand of seasoning, check the recipe on the back to find out how much water it calls for. This one calls for 1000ml which is about 4.25 cups. I added 4.5 because I knew I would be skimming stuff off of the top. I've used curry that only called for 800ml of water before so they're not all the same.

Try making some curry for your family and let me know what you think!

Sunday, April 27, 2014

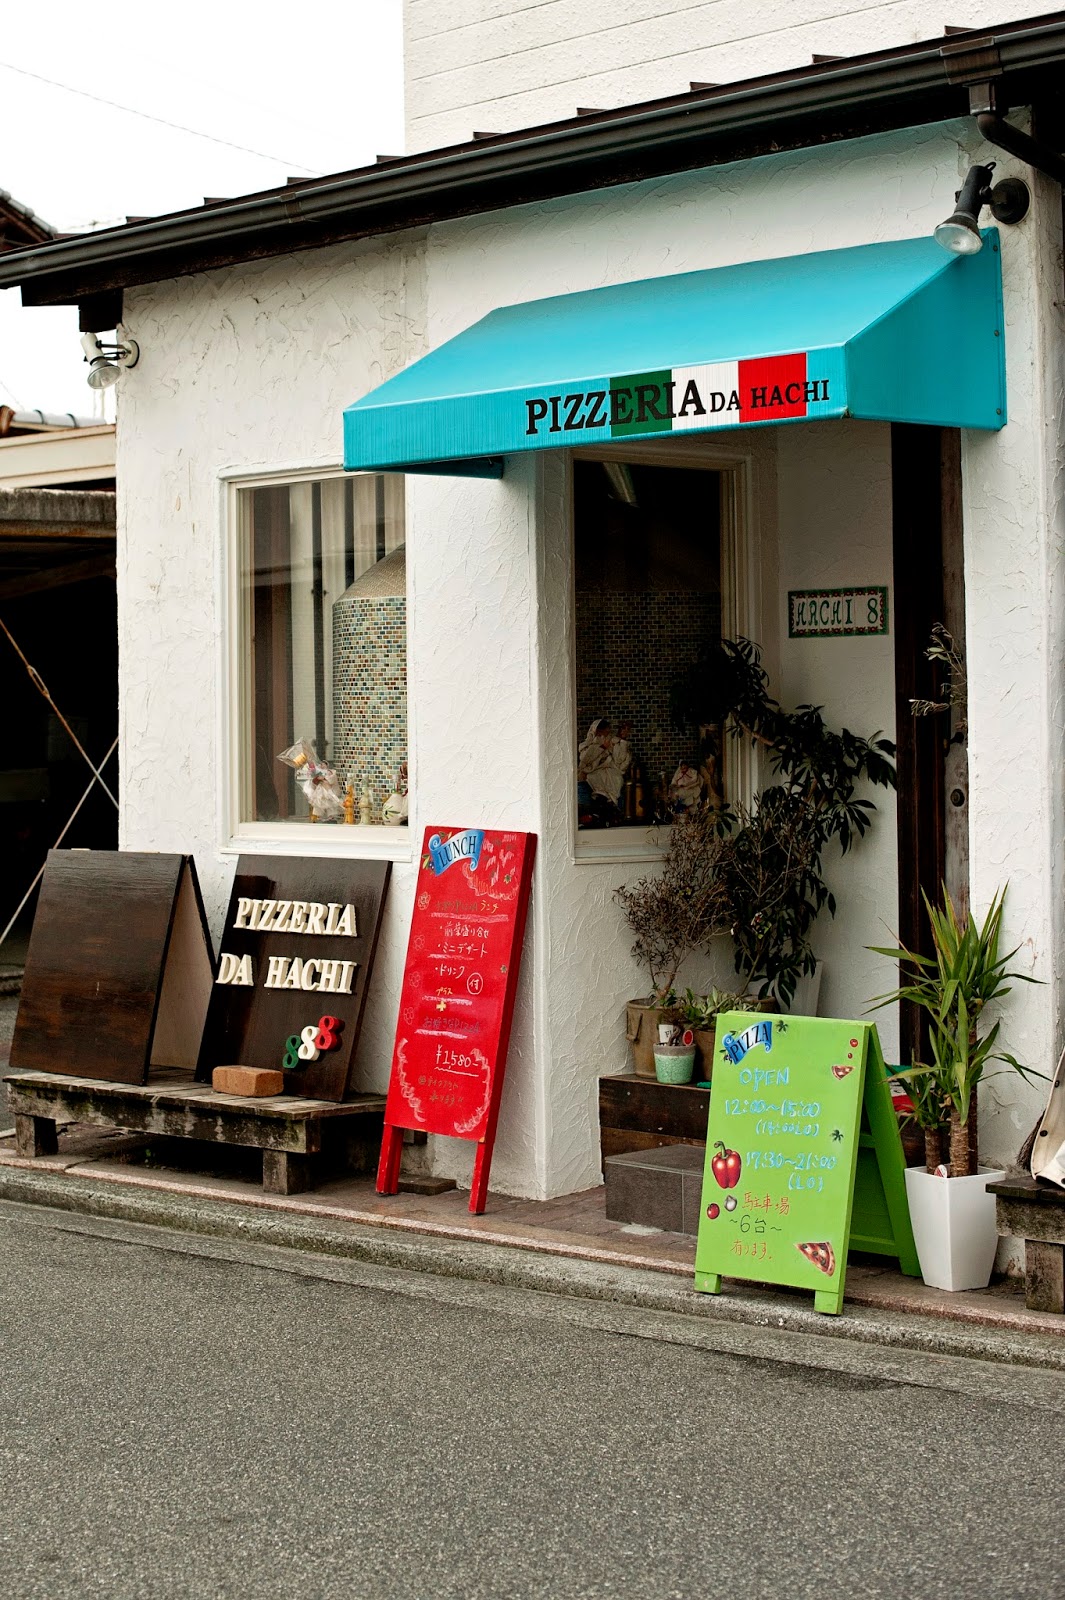
PIZZERIA DA HACHI

I have been meaning to blog about this delicious pizzeria for a couple of weeks now.


My friend, Kazumi, told me about this cute little restaurant and we made plans to try it out for dinner. Good thing she made reservations, because they were full.

We decided to order a couple of different things and share. So we ordered a little appetizer platter and a pizza. Ordering the pizza was a little difficult because we wanted to try at least half of the pizzas on the menu! We finally settled on the "Amadeo". It's a smoked mozzarella cheese and mushroom pizza. I have never had smoked mozzarella before so I was very excited! I was also intrigued by the Italian lemon soda on the menu so we decided to share one of those too.


The lemon soda was really good!


Then they brought out our appetizer plate -
It really was a little appetizer platter, but everything on it was delicious.

When they brought this to our table, I really wanted to skip the picture and just eat a slice!
This pizza was one of the best pizzas I have ever had. I loved the smoked mozzarella and the crust was really good.

Since we were sharing everything, we decided to order the dessert sampler plate and share that too.
Yummy cheesecake, chocolate cake and some chocolate ice cream! Perfect for sharing.

We kind of closed the place down so I was able to get a shot of the inside while it was empty.
It's not a very big restaurant, but I think there were about 6-7 tables.

This post would have ended here, but I overheard the owner telling some other customers that they should come for lunch because lunch is cheaper. So.... I made a lunch date with my friend Tani and came back a week later. My dinner with Kazumi came out to about 3700yen total so I was curious to see how much cheaper lunch would be.

So, with the lunch set you get an appetizer/salad plate, you choose your pizza, and you also get a drink and dessert. I assumed the pizzas would be smaller since Kazumi and I shared a pizza and we were pretty full since we had the appetizer plate too. The cost of the lunch set was also cheaper than what we paid for our pizza at dinner. Less than 1600yen for the lunch set. I think we paid 1650 or 1680 just for the pizza at dinner.

Here's the appetizer/salad plate we got -

This time I ordered the "Quatro Fromage" (four cheese) pizza and Tani ordered the Margherita pizza.
Both of these pizzas were very tasty! By the way, they were the same size as they were when I went for dinner so this really is a better deal!

The dessert that came with our set -

I also got get this shot when I went back for lunch -


I highly recommend reservations for this place. It's fairly new and very popular! Their phone number is (0827) 24-7288
I don't think they speak a whole lot of English so you might want to ask someone who speaks Japanese to call for you.

To get to Pizzeria Da Hachi, go out of Main Gate and continue straight until you hit Three Corners (T intersection). Turn right and continue straight. You will cross a bridge. After crossing the bridge, take the second right turn. There will be a little vegetable stand on your right and a small bank on your left as you turn onto the little side street. The restaurant will be on your right. You can't miss it.

They do have limited parking. There are 3 spaces available right across from the restaurant and there are 3 more spaces at another location. I never found it and ended up calling the restaurant. They told me all of their parking was full, but I could park at the bank on the corner so I parked there. If you go at night, you can definitely park at the bank since they are not open.

Their hours are 1200-1500 for lunch/1730-2100 for dinner.

Check out Pizzeria Da Hachi and let me know what you think!